Monday 16 December 2013

The tale of Damson, and other present stories

Oh blog, I am sorry I have abandoned you yet again. I had thought that the Christmas knitting would spur me into doing lots of knitting-related posts, but actually it threw me into a bit of panic in trying to finish everything off.

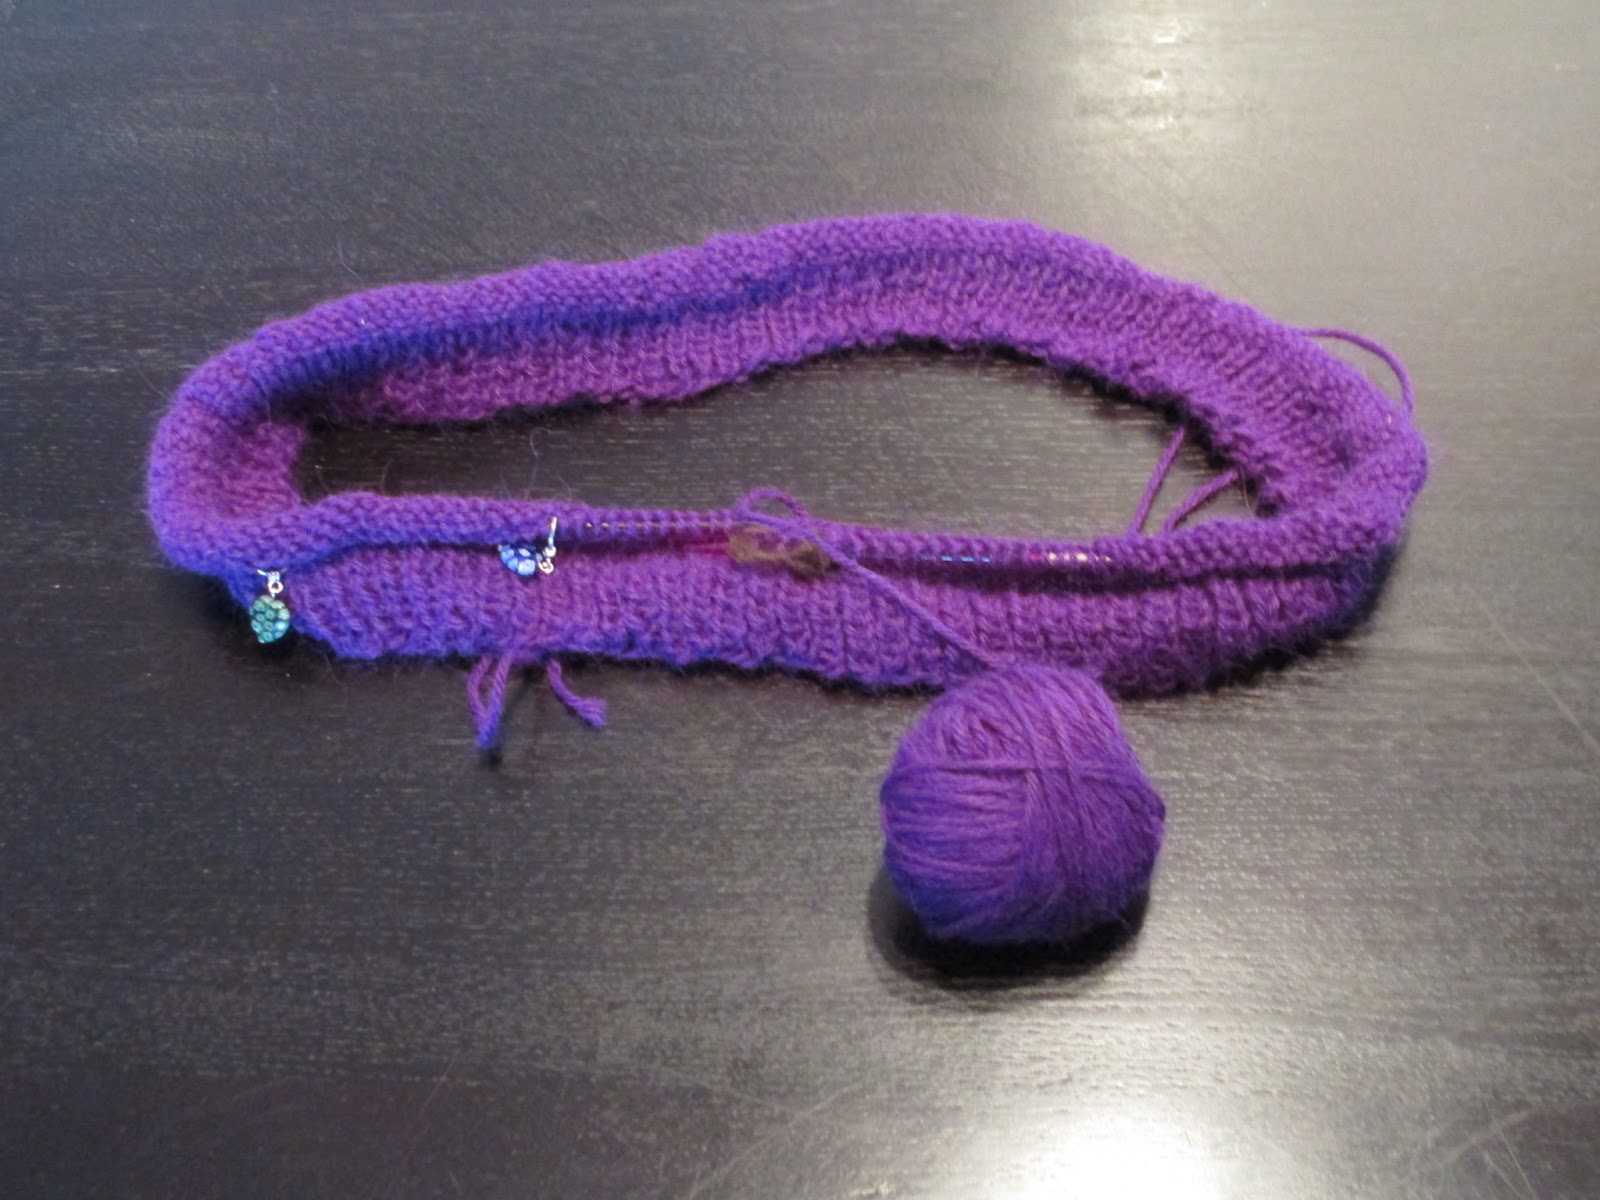
I did mostly pick easy, small, instant gratification patterns, as usual, to make my life easier. But some unknown force made me pick Damson as a gift for my mom. I wanted to make her something nice, and I had always fancied it as a project, plus I was very keen to make something with the super expensive Malabrigo sock yarn. And I swear there were comments on Ravelry saying that it was a fast knit. So what could possibly go wrong?

It all started out well, casting on just 3 stitches. Yes, 3 stitches! The yarn was soft and scrumptious, I whizzed through the first 10 rows of the garter edge. I was happy. But the garter edge involves increasing with yarn overs, so with every row, my progress was slowing down. By the end of week one, I had to force myself to knit 3 rows a day (66 rows of garter stitch in total!) to make sure that the shawl was done on time.

And then the scallop lace pattern began. A bit of counting, a bit of thinking, I was starting to get into it again. However, about 8 rows in I realise I have made a mistake. I continue, telling myself I can live with it. But I can't, so rip back to the end of the garter stitch and start again. At this point I am really starting to worry about whether this is going to be done on time. I give myself the goal of 5 rows a day. I make another few mistakes but I soldier on. The yarns overs means that the stitches are continuing to multiply like crazy. By the end, it takes me an hour to bind off, and I have skipped about 4 rows to make sure I have enough yarn.

Ok so I am a bit of a drama queen, and I am making this sound much worse than it actually was. And the end product is absolutely beautiful, and super soft with the beautiful yarn. Three weeks, however, is far too long for a gift, so unless you have loads and loads of time, I would strongly advise against it! I just really hope that my mom loves it as much as I do now that I have seen the finished product.


Full wing-span. Blocking not 100% successful as there is some curling, but perhaps some ironing will sort this out.
As a shawlette


As a scarf

In other news, I did do some more knitting, but it has been so long since I finished these that I can't even remember the details, so writing a whole blog post about them seems a little pointless.

The first is the Holland cowl, made using the last of the James C. Brett Chunky with merino. My bind-off was a little tight despite using a larger needle, so the fit is a little awkward, but pretty all the same.


And the second, not a Christmas present but a baby shower one, are the two-needle cable booties, which I have made many times before but never added on Ravelry. So this is more of a reminder for my for the next time I need to make booties.


Monday 11 November 2013

Christmas knitathon continues - Growing leaves cowl; braided headband

My Christmas knitting progress has been slow, with family and friends visiting and an insane business trip during which I got maybe a total 12 hours sleep in 3 days (don't ask, I survived just about despite my old, I swear it was easier to go without sleep when I was a student). However, I have managed to knit two more gifts, hoorah! (Although, another four to go, and at this rate I predict another frantic December knitathon).


The first is the Growing leaves cowl, which I made for my 'mother-in-law'. I have never knitted anything for her before, and I am not entirely sure she even likes cowls, but I decided that it might be nice to make something for her, given how generous she was with my gift last year (the DK alpaca yarn and Domiknitrix pattern book), and my total failure to finish the jumper knitted with said gift (hence having no evidence that I enjoyed the gift).

I had the pattern saved in my Ravelry library (although I have no recollection of ever seeing it before), and I thought it looked pretty and cozy for when it gets even colder. It has everything I could ever ask for from a pattern: knit in the round, lace that is simple enough to remember but enough to make the knit more interesting than boring stockinette, and bulky yarn for a speedy knit. Also, no mods necessary, although I did make a teeny mistake towards the end, with the last leaf, but I don't think its noticeable.

For the time being, I have decided not to block it, as I think  it actually looks better with the '3D' leaves than it might look if the lace were flattened. The lack of blocking also means that it is cosier, perfect for those cold winter mornings.


Detailed view of the lace


Another bad selfie with minimal lighting

At least with a cowl I can hide!


The second gift is the Braided headband, which is supposed to be a rip-off of an Anthropologie headband (and incidentally I think the headband that the friend for whom I made the Vanessa headband wore all of last winter, maybe I need to re-think which one I give to each friend). I actually found a few patterns that aimed to emulate the Anthropologie headband, but this seemed to be the most straight-forward, as it is basically just a very wide cable knit over 16 stitches.

Once again, bulky yarn and fairly small project made for a speedy knit, and a very happy knitter (despite the need to do a bit of sewing; this is knitted flat rather than in the round). The only mod was to knit using 8mm needles rather than 9mm ones, which I don't have (and I keep forgetting to buy). I also did not block this one to avoid flattening out the cable and destroying the braided effect.

Here it is worn

And close-up

Both were knitted with James C. Brett chunky with merino (bought at the Knit and Stitch show), and one skein (100g) was enough with a tiny bit of leftovers (yay for no wastage!). Although for the cowl I think it would be worth using a more luxurious yarn.

Ravelry links: Leafy; Braided


Sunday 27 October 2013

One for you, one for me - catching butterflies

Yes, I know, I am supposed to either be knitting my jumper or making my Christmas presents. But another one of my purchases from the Knit and Stitch show was Woodland knits, which is full of very cute patterns (most of which I am unlikely to ever make as they are a little too quirky even for me, but at half price who could resist?). So instead of pressing on with my Christmas list I decided to make the catching butterflies fingerless gloves for myself - it is getting cold after all, and doesn't every girl need a new pair of fingerless gloves per winter? They are just too cute to resist! And in my head I figured it might be best to test-drive the pattern for myself before making it for someone else.


The glove body pattern is fairly simple to follow and involves some cabling to produce what I imagine is meant to look like little butterflies. Really, they just look like Vs, but with a little imagination I guess the lines could be perceived as butterflies. The actual butterflies are then knit separately, made more butterfly-like with the addition of a body (I wasn't entirely sure what I was meant to use for that so just used some thread. The small ones are then stitched on the front and the big ones on the palm of the hand.

The pattern suggests using 2.75mm  needles for the rib and 3.25mm needles for the body, but I only have 3mm ones so I used them and it worked out just fine. Although this is for my hands, which are pretty small - I think they would just not fit someone with slightly bigger hands, so you might need to experiment a little with needle size. Similarly, for the butterfly the pattern called for 2.25mm needles but I only have 2.5mm ones, and to be honest I doubt it really matters!

As for the yarn, I went for Debbie Bliss Rialto 4-ply, which is very soft and shiny, and thus has very good stitch definition. The butterflies are made with Rowan kidsilk haze.


The front, with tiny butterflies attached
The back, with big butterflies attached
 The butterflies have caught the light very strangely in those photos and look very fuzzy. They are in fact pretty fuzzy (although not to that extent), but I think that is the idea given the use of kidsilk haze. I did consider not forking out the money for it given that the pattern only uses a teeny amount but I wondered whether the effect would not be quite so pretty. In hindsight, another very thin yarn might have worked out well enough too, and perhaps they would have looked a little less like bows and more like butterflies? The kidsilk haze is quite difficult to work with anyway, and so they were a little fiddly, especially when trying to add the body. So the small ones in particular look quite wonky, and I am not sure how happy I am with them.

Slightly clearer image, in which the butterfly is more defined.

Fuzzy butterflies aside, I am pleased with them and I do think they look pretty. If I were to make them again (another Christmas gift in theory), I would probably make the body shorter (so do two instead of three pattern repeats before starting on the thumb) as I am not sure it is necessary, and instead make the top a little longer (perhaps by adding half a pattern repeat) to make them  warmer - as you can see, the top stop quite close to the bottom of the fingers, so there is very little coverage.

Ok, back to that Christmas list!

Raverly link

Saturday 19 October 2013

The Christmas knitathon begins - Vanessa headband

Last weekend was London's Knit and Stitch show - if you have never been to one, I thoroughly recommend it, for the atmosphere, bargains and the vast array of yarns that you have probably never heard of before (yarn from camel anyone?). I spent another crazy day walking , being totally overwhelmed by choice despite my promising myself that I would be decisive this year! That plan of course went totally out of the window, and I wandered around for 4 hours, grabbing bargains and luxury delights left and right (as well as the occasional non-craft-related item).


So, like last year, this marked the time to get a start on some Christmas knitting. Although I have decided to make fewer presents this year, I thought it would be good to at least get a few done early to avoid the mad rush in December, and also to lift my knitting spirits, which have been destroyed by my inability to finish the sweetheart sweater (it has not been touched since I last blogged, obviously intarsia is proving to be some sort of nemesis for me).

First, I decided to work on the Vanessa headband, for a friend who wore a very similar one all of last winter - need to give the girl some choice! This headband comes in two widths and has a wide cable running through it that I think makes it look really pretty. It is knitted with bulky yarn and 8mm needles, so a very fast knit indeed, especially if you choose to go for the narrow version.


Apologies for the colour, the sun has left the country
And here is a close up
 The yarn is Mirasol Kutama (naturally bought at the Knit and Stitch show), and I think you will agree is a beautiful bright blue, even if my crappy pictures don't capture the colour very well. It is 100% wool but very soft, and was nice to work with, ie not too unwindy or sheddy. I wish I had bought more of it to be honest as it was a bargain! The narrow version of the headband used around 30g of yarn, so there is a little left that could be potentially combined with some of my numerous scraps to make another headband.

I also made another High-street cap - being such a fast knit and using so little yarn makes it the perfect gift. The yarn here is James Brett Chunky with merino (a brand I have only ever seen at the Knit and Stitch show) and is a very decent wool mix. In fact I bought it last year to make a bow scarf for the recipient, so now she will have a matching hat.

Just as a note, I decided to knit the first pattern repeat with 6mm needles to make sure that the hat sits a little more tightly on the head, switching to 8mm needles for the body. And did an additional pattern repeat, so now it does cover the ears more. I am much happier with this one than the one I made for myself, but I guess this is why it is usually good to experiment with a pattern before making one as a gift!


Saturday 5 October 2013

Healthy chocolate treats

Last month I went on a yoga retreat that was also meant to be a detox weekend. The food was not really detox for me, as it was fairly similar to how I eat at home, bar the lack of cheese and gluten. However, we did have some delicious chocolate balls as dessert one evening; they were yummy and apparently semi-virtuous as they had no sugar and were instead sweetened with dates.  Now, I personally don't like most dry fruit (and dates in particular kind of freak me out, I think they look like bugs!) but it must be the texture rather than the flavour, as in this case the dates are mashed up and give the dark chocolate a lovely sweetness.


I got a rough recipe from the retreat teacher, and then looked all over the internet for something more specific, and today I finally decided to give them a go, by amalgamating bits and pieces from the different recipes I found. (Note that when I say cup, I mean small mug.)

Base recipe:
1 cup of dates
1 cup of ground almonds
2.5 tablespoons of cocoa (I used Green and Blacks)

Place all the ingredients in a blender and blitz until the dates are completely broken down and the mixture has an even consistency. This was one of those occasions when I wished I had a food processor rather than a hand blender, as this made quite the mess in the kitchen. But I promise, it is doable!

I thought it looked a little dry at that point so I added a splash of almond milk, although any liquid would probably do.

To make cocoa-orange chocolate balls, add the zest of half an orange to half the base mixture. Then roll into balls (around one teaspoon of mixture per ball). This will make around 10 cocoa-orange chocolate balls.

To make coconut chocolate balls,  roll the rest of the mixture into balls (again, around one teaspoon of mixture per ball) and roll each ball onto desiccated coconut. As above, this will make around 10 coconut chocolate balls.

These will then need to sit in the fridge for a bit to solidify a little more, and then you can eat them, yay! The texture is almost like raw cookie dough weirdly (kind of soft and cheewy), which is probably another reason I liked them so much. For me, these are sweet enough, although the other half said they could have been sweeter. I guess if you do try them you can experiment a little with the amount of dates added.


Cocoa-orange in the back, coconut in the front. And yes, some are missing!


Saturday 14 September 2013

High street cap

Summer came and went, and as predicted I did zero knitting after finishing the Petrie shell. But with the first chill, I picked up once again the Sweetheart jumper and have now almost finished the back. At this rate, I might be done next summer!

So I needed an instant gratification project to make me a bit more optimistic about finishing projects, and, well, get back into knitting again. When I joined the WI I used one of the vouchers that I got to subscribe to a craft magazine called Mollie Makes, and other than a crochet bow kit I hadn't really delved into any of the projects included. I remember seeing a cool-looking hat (called high street cap), but sadly it was not in one of the issues that I already had. Nevertheless, I figured that $4 isn't really that much, especially for a project that I might make more than once.


It turned out to be the best possible project I could have picked, as it was super-fast, probably took just over two hours! Knit using bulky yarn and 8mm circular needles (the pattern calls for 9mm needles, but I don't have any), the hat is basically an easy to memorize sequence of ribs followed by yarn overs to create an eyelet rib.

I followed the pattern exactly, but it felt a little too short, sitting quite high above my ears, so I finished it with three rows of half-double crochet on the rib to make it a little longer - I think if I were to make it again I would probably do another pattern repeat. Also, it feels a little loose so I would also be tempted to do the first pattern repeat on 7mm or even 6mm needles to make it tighter around the base. The looseness might also be because I blocked it, which I think stretched it out a bit.

As for the yarn, well the only bulky wool I had was the leftover Rowan cocoon from my Lore hoodie, which I had swore not to use ever again as it is super sheddy and annoying because of the mohair. Well, I went back on that, covered myself in tiny hairs as if I had a white cat, and ended up trying to trim the mohair off the top to stop it being so fuzzy. I am certainly never buying this yarn again, despite it being very soft. 


Here it is worn


And here you can see the pattern detail a bit more clearly


Sunday 7 July 2013

Petrie - the final chapter

The saga of the Petrie shell from Knitty is finally over. In case you weren't following, this was a project I started at the end of April as something summery I could finish fairly quickly. Well, it clearly wasn't! Maybe it was the many distractions (conference in Italy, wedding in Greece), maybe it was the endless stockinette... Regardless, this felt like it was never going to be finished.


Hindsight is a wonderful thing, as they say, and there are many many things I would have changed in this pattern - no offence to the pattern designer, but for me several things were plain unnecessary. To be honest I only have myself to blame, if I had read it properly and in full before starting I would have been able to make the changes anyway. So here goes. This is definitely something that can be knitted in the round. I would have just knitted it in the round until the armhole, at which point I would have separated the front and the back and the re-joined at the top with the three-needle bind-off, as written in the pattern. No boring purling and no counting rows to make sure that I have knitted exactly the same on each side (the pattern only specifies inches in length, not rows). And no messy sewing - it took me forever to stitch the two sides together with a kitchener stitch, which I concluded is the only way to do it if you don't want an ugly seam on each side. Oh, and much much fewer ends to weave in, another thing I find absolutely boring.

On the same note, I would not have done the hem, at least not the bottom one. I can see why she designed it that way, but as you may have concluded, I do not like sewing. I sewed both top and bottom hems with the yarn at first, but then when I put the top on the top one was curling down too much and showing the stitching on the inside, so I had to re-do it with some thread to even it out a bit more.

I thought I might add a note here about the wonders of blocking. See the photo below, you will notice how much the stitching is raised in the middle - I was actually quite worried that this unevenness would not go away, but thankfully it did. I actually soaked the top in some water with eucalan (which does not need rinsing), scrunched the water out by rolling in a towel and laid it flat for a couple of days until it dried.  

Before

After


There are still two issues with this top, however. The neck sits quit funny (see photo below) - perhaps I should have blocked it in a different way, but I just can't make it less floppy at the moment. The second is that, as soon as I wore it the bit near my waist creased in a weird way that looks like I have a roll of fat underneath (I swear, I don't!) So perhaps I need to re-block it to sort these issues out. Or just learn to live with them. At least it is not transparent, as I had feared, so can definitely be worn on it own.


Not as good a photo as the previous one. But at least it's finally summer in London!

Monday 17 June 2013

Emergency procrastination - short and sweet bolero

This was running the risk of becoming a graveyard of unfinished knitting projects, but thankfully I have finally finished something. And no, it is not the Petrie shell or the sweetheart jumper. I decided last weekend that I needed an emergency bolero or shrug to wear to a wedding this past Saturday. Which meant that I had to be done super quickly. Which meant a crochet project.


When I first learnt to crochet a few years ago I picked up the "happy hooker" stitch 'n bitch book to get to grips with the basics and to practice with some projects. I think one of the first things I ever made was the fit to be tied bag (made twice now) as a cute an easy project, and then became more adventurous and attempted the cupcake top (which I occasionally wear, although the bamboo yarn means it had stretched out a bit). But one of the projects that I always had my eye on was the short and sweet bolero, as a cute little cardie to wear in the summer.

So the choice for which bolero/shrug to make was easy. And yes, it was in fact pretty speedy, although it did involve some furious, non-stop crocheting on the whole of that Sunday to get the body done (achy hands!), plus a couple of hours on the Monday and Tuesday to do the sleeves. I had some issues following this pattern which are not new apparently ( I found quite a few helpful comments on Ravelry), and when making the right front I ended up following the chart rather than the written pattern. Otherwise it was pretty easy to do and memorise.

The yarn is rico cotton, which is aran weight rather than worsted, so I decided to go for the smallest size (naughtily did not check my gauge) and that worked out great. Although I did find that, as a result of the weighty yarn, the bolero was heavier than expected. This means that it holds its shape very well though, but still I think I may have preferred to make it with dk in a bigger size. Incidentally, that was my plan, as I have a tunic in dk weight that I never wear, but despite my efforts I totally failed at picking it.


Anyway, the good news is that I have a decent photo of me modelling it for a change,  so you do not have to endure yet another grumpy-looking selfy! Thankfully taken after only two glasses of champagne too :p

yay! she smiles at last

Sunday 26 May 2013

Baking gone a bit wrong - honey and peanut butter bars

My friend was coming to stay for a few days, and trying to play good hostess I asked her what she wanted to have for breakfast - given that we are a weird household when it comes to this supposedly important meal and either skip it entirely or just have cereal bars. So I bought a big box of porridge oats for her, but then was left with a dilemma: what to do with the remainder? Well, I'd been meaning to make the Hugh Fearnley-Whittingstall's honey and peanut butter bars, and now was my chance.

Stuck at home on a beautiful Sunday afternoon, I decided to give them a go. Of course any normal person would read the recipe, go to the shop and buy the ingredients etc etc. But not me, in the spirit of experimentation I decided that, even though I didn't have enough of most of the things needed to make these bars, I would press on.

Not enough butter? No problem, instead of 125 grams I just used the 50 grams that I had, thinking I could supplement with peanut butter. But no, not enough peanut butter either, so I just chucked in the pan 140 grams, desperately trying to scrape as much as possible out of the jar. No oranges? Just try and zest an already zested orange to get a teency bit of zest out, supplementing instead with the juice of said orange and the zest of two lemons instead of one. And who weighs honey? Its a pain to even get off the spoon in the first place, let alone getting it off the spoon, onto the scales, off the scales and into the pan (some hindsight googling reveals that one tablespoon, which is what I used, is about 15 grams, so again, way off the 45 grams the recipe calls for). Oh yeah, and the the mixture didn'y quite fit the dish, so I left a gap. What could be the harm.

Well, they didn't quite work. They taste nice (and actually sweet enough, so not sure about the sugar and honey quantities) but the consistency is  different to the ones I had tried before, I assume because of the reduced fat content and reduced amount of honey. And of course, in the spirit of totally ignoring the recipe, I cut them too soon so they crumbled a bit more than they should have. But I guess not bad for such a deviation from the original!


So the moral of the story is, don't stay in on a sunny day and stick to the recipe.

Edit: I am assured that they don't taste like they went wrong, so maybe not such a disaster after all. 

Sunday 19 May 2013

Geeky knitting - knitting a retina!

My plans to finish my Petrie shell in 2-3 week were completely optimistic as usual - I did very little knitting while on a (work) trip in Italy, as I was busy busy busy! I did manage to get most of the back done, but there's still a long way to go (should really have converted it to knitting in the round, I have decided that purling really slows me down). And to complicate matters further, I agreed to participate in collective knitting project.

Last month I joined the WI (women's institute) in an effort to meet some local women and participate in some fun (and crafty activities). The WI is quite an old institution, and has typically been associated with old ladies baking cakes, making jam, knitting and drinking tea. But in recent years it has seen a revival of sorts, with many 'new wave' WIs opening up around the UK, in particular in urban areas such as London, and attracting younger women. After a lot of research in the local WIs, I braved my first meeting back in February (for some cheese tasting!) and then joined properly in the April meeting, when we learned how to quilt.

A couple of weeks ago our president asked us if we wanted to participate in a collective knitting project, organised by the knitting group of the Institute of Ophthalmology in London. Their aim is to create a knitted retina, down to the cellular level: rods and cones (the photoreceptors, or simply the cells that detect light and offer visual information), retina ganglion cells (the cells that receive the visual information from photoreceptors and transmit it to the brain), bipolar cells (which transmit the information between photoreceptors and retinal ganglion cells) and muller cells (a type of glial cell that support other neurons in the retina). For anyone interested, here is a schematic of approximately what this looks like. One of their members wrote the patterns to knit each cell type, and they were looking for volunteers beyond their knitting group to knit the various cell types.

I offered to make a couple of rods, and here they are. The pattern was really simple, and the knit quite fast, but as usual the sewing up was my downfall (and this is why I probably won't offer to knit any more!).

Three rods! (one of the right is a bit wonky though)


If I remember correctly, once the whole project is finished and assembled (around November), it will be on display at the Moorfields eye hospital in London (or the Institute of Ophthalmology), with a brief stint at a nearby gallery. Hooray of geeky knitting, I want more!

Tuesday 30 April 2013

Summery procrastination - the Knitty Petrie shell

Progress on my sweetheart jumper has been very slow (no idea what I was thinking when I said that it would likely take a month, its DK yarn after all), and I think it has become clear that by the time I finish it it will be too warm to wear it. I think this is partly because purling while doing stockinette (ie knitting flat) is much much slower than knitting on the round. I am currently close to finishing the back, but there is a looooong way to go!


So against my better judgement I decided to pause it and start a new, more summery project. I first spotted the Briar cardigan in Simply Knitting, which looks cute and summery, and bought the recommended Rowan cotton glace for it. But the lack of correct needle tips for my circulars, and my impatience in using tiny straight needles made me switch to the Petrie top from Knitty - I just love the neckline on this. Of course complications arose because my yarn is sport and it calls for DK, so I had some issues with getting the correct gauge. I started out with 4mm needles, as suggested, which gave me the correct gauge (with the fabric being a little more transparent than I would like though), but after knitting 10 rows I measured the piece and it seemed much bigger than what it was supposed to be for a size small. I then switched to 3.5mm needles but my gauge was off, and after some deliberation I went back to the 4mm needles; hopefully it will not be too big and not too transparent.

Being optimistic again?


The yarn is actually quite beautiful to knit with and  has a lovely sheen a, so I am looking forward to a nice, drapey top. Optimistically once more, 3 weeks? Although the top is made in two pieces knitted straight, so I might struggle a bit, as usual, with the stitching. And yes, this means it is knitted flat like the sweetheart jumper. But I never said I was rational :p

Tuesday 9 April 2013

Chocolate orange cupcakes

I have been experimenting with the lovely "Red velvet chocolate heartache" book for a few weeks now, with the cinnamon-banana loaf (in cupcake format) being a firm favourite. So at this point I decided I was brave enough to adapt one of the recipes extensively and create something of my own (and thus for which I can post the recipe here, yay!).

Chocolate and orange cupcakes (makes 12)

3 eggs
180 grams light  muscovado sugar
200 grams butternut squash
100 grams ground almonds
100 grams plain flour
60 grams cocoa powder
zest and juice of one  orange
2 tsp baking powder
1/4 teaspoon salt

  1. Preheat the oven to 180 degrees (fan oven)
  2. Grate the butternut squash very finely
  3. Using an electric mixer, beat the eggs and sugar for about 5 minutes
  4. Add the butternut squash and mix until incorporated
  5. Add the ground almonds, flour, cocoa, zest and orange juice, baking powder and salt, and mix for another 1-2 minutes
  6. Using a tablespoon, add the mixture into cupcake cases within a tray - I have a silicone one so that can be used without the cases, which is handy.
  7. Bake for 25-30 minutes. Remove from the oven and cool in the tray on a wire rack for 10 minutes. Carefully take the cupcakes out of the tray and allow to cool completely on the wire rack.
I am not a fan of frosting, as mentioned before, and I think these are really good on their own. However, I understand I am a bit weird in this respect, so if you are a fan of frosting just use your favourite recipe to garnish these.

Chocolate orange cupcakes in the front, cinnamon-banana-pecan ones in the back


Monday 1 April 2013

Sweetheart jumper (and procrastinating intarsia again!)

I have procrastinating starting my next project for a while now because I couldn't face learning how to do intarsia (even though one of my plans for this year was to learn how to do colourwork), and instead have been making headbands (see seedy bow headband and crochet bow headband posts). But enough is enough, given than my weakest aspect is starting a project rather than carrying on or finishing it, I decided to just start it and learn instarsia on the way.

The project is  sweetheart from the Domiknitrix pattern book, a gift from my 'mother-in-law' for Christmas. She also bought me four skeins of lovely and soft yarn, Artesano alpaca DK in a very very bright purple :) So I decided that, instead of just making a few small projects, it would make more sense to supplement the yarn and making the jumper - apparently she had also spotted it as a nice one to make from the book, so it just seemed like the perfect plan.


The jumper is a bottom-up construction that is knit in the round until just above the waist and the split into two, with the back done first, followed by the front (which has the colourwork). My plan is to get to the colourwork and then do a practice swatch - hopefully by that point I should be a bit more enthusiastic about learning this new skill. I decided to go for the small size (34'') and I'm hoping that it won't be too big, I was pretty much bang on with my gauge swatch using 4mm needles (as recommended), but I have had issues with sizing before, and it is really hard to tell with a bottom-up knit as you can't try it on. Fingers crossed!

Not gotten very far yet, but hopefully doable within about a month


Saturday 23 March 2013

Harry Eastwood's orange squash cupcakes

Blog, you have not been ignored, I have just been away for a few weeks, having an amazing time in Peru (a knitting-related post regarding Peru will follow at some point). So instead of waiting to start my next knitting project, I thought I would blog about this amazing cake baking book I have discovered.

As you know, I have been in search for a way to still do my baking every week but not end up massive from eating too much cake. I can't remember how but I stumbled upon a book on Amazon entitled "Red velvet chocolate heartache" by Harry Eastwood, in which the cakes include finely grated vegetables and nuts instead of butter. It seems a bit crazy, but the reviews were so good that I got pretty tempted. I had a look to see if any of the recipes were available online, and then tried the chocolate peanut cupcakes (which are make with butternut squash instead of butter) to test it. Note that I don't normally  like cupcakes because I don't like icing (too sweet for me), but I decided that I could just make cupcakes without the icing, similar to tiny little cakes (and I guess easier to eat). I was pretty impressed with the results, the cakes were moist and chocolatey, albeit under-sweet but that was my fault for using less sugar.

So I took the plunge and bought the book. I have since made the banana cinnamon loaf in cupcake format, and they were absolutely delicious, probably the best banana cake I have ever made (I couldn't actually limit myself to one per day, ended up having two!). And today I baked the orange squash cupcakes, which again are made with butternut squash instead of butter, as well as ground almonds for a bit more moisture. The interesting aspect today was the I stuck to the recipe and used rice flour instead of regular flour, as suggested. If I am entirely honest, I am not sold on rice flour, the author says that it offers "a lightness of touch", which is true, but for some reason I am convinced it has a bit of an after-taste. But possibly that's just me. It can definitely be replaced with regulate flour, so I might alternate between in the two in the future.

Un-iced, but glinting from the sugar and orange juice I poured on top

So my verdict so far is, buy this book! It might be a bit more effort to finely grate the veg (especially butternut squash is a bit of a pain), but the cakes are beautiful and it always seems like a bit of an adventure, as I have absolutely no idea how they will turn out!

Friday 22 February 2013

Crochet bow headband

Procrastination continues, this time in the form of a crochet headband. This is based loosely on the construction of the knitted one I made last time, which I thought was pretty clever.

The idea was that it might be handy to have a cotton one that is much thinner than the knitted one I made before to keep my hair in control when the weather is warm. I was probably a little spurred on by the fact that I am going on holiday to Peru (yay!) very very soon. I figured that a crochet version would be much much faster to make than another knitted one, so I decided to have a stab at designing one myself. I tried a few ways of doing it and this was the best and easiest one. This is obviously very very basic, as I haven't quite ventured into the designing world yet. So bear with me if the instructions are crap.

Yarn: (I think) Pattons cotton DK
Hook: 4mm

First, ch10, then hdc on the second chain from the hook and across - 8hdc
For the next row, chain hdc across, and continue until the headband is the desired size (mine was 56 rows). At that point, join the two edges together using slip stitch. You can obviously stop here for a plain one.
For the flap of the bow, turn and hdc along the next 5 stitches, turn, hdc on the same stitch and across (5 stitches). Continue for 10 rows. Cut the yarn, leaving quite a long tail, and secure the last stitch on the hook.
For the bow itself, ch8, turn and sc across (8sc). Continue for 17 rows, and then cut the yarn, securing the final stitch.
Place the bow on the headband so that the flap runs across its middle, then turn the flap under the headband and then over the bow. Line up with the edge of the bow and of the headband and sew it on. If this makes no sense whatsoever, have a look at the pattern for the seedy bow headband, she had helpful pictures showing how to do this.

Hard to tell with black yarn, sorry!


Saturday 16 February 2013

Whole orange chocolate cake

I finally got round to making this no butter, no flour whole orange cake. The idea is basically boiling an orange pretty much to death, and this, together with the ground almonds (which substitute the flour), provide the moisture to the cake. The 6 eggs (!) possibly have something to do with this too. 

This is apparently a Nigella recipe from her book Feast. As it has been published in about a billion places online already I don't feel so bad about posting parts of the recipe here (as an FYI I got it from here).

You will need:
1 large orange
6 eggs
1 teaspoon baking powder
1/2 teaspoon bicarbonate of soda
200 gr ground almonds
250 gr caster sugar
50 gr cocoa


First you boil the orange for about 2 hours. I'd suggest putting a lid on the pan as the whole kitchen filled with steam and stained our ceiling. Then drain the orange and blend it. I actually did this 2 days in advance and stored it in the fridge.


Then add the rest of the ingredients and mix them (I used an electric hand mixer) until you get a good cake mix consistency. The mix makes more than what you can fit in one loaf tin, so I had to pour some of it in a second tin - I guess about 2/3 of recipe makes enough for a regular loaf tin. Then bake at 180 degrees C. The recipe says to bake for an hour - I took my small cake out after  30 min and the big one after 45 minutes because it had started to burn. Perhaps the 180 degrees is for a non-fan oven?

The one in the front is the mini one (ie thin one) and the one in the back is the proper one, which caught a bit on the top
The cake was absolutely delicious, it is very light (probably because of the absence of butter) and very juicy from the fruit. I liked it so much I am having trouble not eating the whole thing in one sitting! 

Thursday 14 February 2013

Seedy bow headband

I have been procrastinating starting my next big project because it involves learning and practicing intarsia beforehand. So instead I decided to make another headband, the seedy bow headband (can also be found here).

Headbands have been very popular in the past couple of years, and they are great little projects to work on: they are very fast and take very little yarn (I have only ever made them using scraps). And I find that they are better than hats at keeping your ears warm, plus they don't squash your hair as much, which is a bonus.

I made this using leftovers from a hat I made as a gift over Christmas. As an aside, I didn't really like this yarn (James Brett monsoon; bought at the Ali Pally knitting fair again): although the colours are pretty and it is very soft, it is fuzzy, not tightly wound and had random furry bits and thin bits scatted throughout. The pattern is very very simple (for a beginner knitter really!), although I find seed stitch quite dull. I modified it slightly, by casting on 85 stitches, knitting 3" for the main band, and then casting on 25 stitches for the bow and knitting 2".


So if you have some scraps left over from a bigger project, why not have a look at ravelry for some headband ideas?


Saturday 9 February 2013

Granola chocolate chip cookies

I had planned to go for another low-fat recipe for this week's bake. However, I was a little short of time for a cake - some friends were coming over to our neighbourhood for lunch and I wanted to quickly prepare something in case we decided to come back to ours for coffee (you should always have something at home to give to guests, rights?). I was tempted to go for the peanut butter choc chip cookies from the Primrose bakery cookbook because I have made them before and they are truly yummy, but in the spirit of being adventurous I decided to try the granola white choc chip cookies instead (from the same book).

I have wanted to try these for a while, but granola is not cheap, and somehow it felt like a bit of a waste to use it for cookies. The book suggests making your own and includes a recipe for this, but I still haven't gotten round to that (will certainly write about it if I do anyway). So I bought probably one of the cheapest boxes of granola I could find that still looked pretty tasty (in case I wanted to eat it for breakfast) and came in one of my favourite flavours - apple and cinnamon. I really dislike white chocolate (its not chocolate, its sugar!) so instead I used some regular chocolate chips, but not that many so as to not overpower the granola flavours. The recipe also calls for almonds, which I did not include.


(I quick clearly need to start taking better pictures!). 

Ok they do look a bit wonky, but I was in a rush so I basically just dumped a spoonful of dough on the baking sheet rather than make nice symmetrical cookie balls. They also look a bit paler than I expected - I contemplated leaving them in for longer than the recommended 10 minutes, but then you run the risk of them drying up.

Verdict: I thought they were pretty tasty and the right level of chewiness, with a good crunch  and a nice cinnamon-y flavour from the granola. Next time I would probably either opt for a plainer granola and add more choc chips (or maybe just oats, that's a classic too although you lose the crunch ), or omit the choc chips and use a tasty granola like this one. 

PS. I debating whether it was ok to post my 'adapted' recipe here. I read through some articles about the rules of copyright and recipe re-posting.  Although technically what I made is sufficiently different from the recipe in the book, I feel that it is a bit wrong to republish something that is not freely available without permission (my line of work has probably instilled some copyright guilt in me...). At least for now anyway.


Friday 8 February 2013

Shapeshifter shrug: fin

My beautiful shapeshifter shrug, the reason I bought the Vampire Knits book in the first place, is complete. What attracted me to this was the idea that it is versatile, so if one day you fancied wearing it as a scarf you could, and then the other day you could switch to wearing it as a shrug.

I bought the yarn (Colinette Art) at the knitting fair in Ali Pally a few months back - I was attracted to the colour of course and also the softness, as it is a mixture of wool and bamboo. As usual, my stinginess meant that I did not buy enough yarn to make this as big as it was supposed to be; my two skeins were way under the recommended yardage (I have no idea why at the time I thought it would work). So, instead of casting on 96 stitches I cast on 80 (I had to work out how many repeats of the pattern there are to subtract a few and still make sure that I had an appropriate number of stitches). My reasoning for doing that was that I would rather it were longer than wider. The fact that it is worked in two halves was to my favour, so I just knitted each half until the skein ran out. It ended up being about 20 inches after two rounds of blocking, which comes up to around my elbows.

Ok here are the terrible pics as demonstration (this is what happens when you use an iPad to take photos...).

Here it is with the buttons folded, when it can be used as a scarf. I don't think the colours have come out as beautiful as they really are in this picture. The edges are based on the lace pattern, which is annoyingly different for each row and thus requires quite a bit of concentration! (but always more fun than boring stockinette)


The most obvious choice (and annoying the only one demonstrated in the book) is to wear it as a shrug by buttoning up some of the buttons.


Alternatively, you can keep your shoulders warm but using it as a shawl. Some 'illegal' buttoning (or maybe a broach) will also allow you to wear it as a capelet


If you prefer thinner scarves you can also wear it at its max width, wrapping around and then just buttoning a couple of the buttons to keep in place. I think this is likely to be the way I will use it the most, as the lace is also nicely on display. There are also a few different ways of doing that to get different effects. 


(Obligatory vintage-looking photo)


There was one option that I really fancied, which was to wear it as a hood/neckwarmer (spotted in a very helpful blog post). However, mine is not wide enough for that, so if you also like that option you better follow the instructions (something I am clearly not very good at).

As an aside, I made the buttonholes go over 2 stitches rather than 3 as instructed, because my buttons were a bit smaller. However, I am not very happy with them, already they feel a bit stretched out, and some of the buttons just pop out. So next time I make something with proper buttonholes (rather than my usual improved 'illegal' buttoning), I will need to do some research on the best method (if anyone knows of any please let me know). 

Time to start the next project! 


Monday 4 February 2013

Low-fat cake?

That's absurd, right!? I have been trying to bake something every week in an effort to get better at it, but this does not work well with the post-holiday, post-diet weight gain. While on a diet last year I stumbled upon a recipe for a cake with no butter, just yoghurt, so I thought I would give it another go.
I based it on this recipe  for orange and yoghurt cake, but I decided to try lemon and poppy seed instead.

I used:
170g total 0% greek yoghurt (ie one small tin)
2 tablespoons extra virgin olive oil (I think that's 30ml?)
Zest and juice of 1 lemon (although in hindsight 2 lemons would have been better).
3 eggs
200g plain flour
1tsp baking powder
Poppy seeds (didn't measure, just stirred in until the distribution looked right).

Then followed the instructions as per the recipe above (ie whip eggs, yoghurt, oil, lemon zest, then add dry ingredients and mix some more before adding the poppy seeds and lemon juice). One thing that always annoys me with cake recipes is if the instructions don't specify fan on non-fan over. In this case I assumed it meant non-fan so baked at 160 degrees for 45 min, and then I think another 10 minutes until the tester came out dry. Pressumably the extra baking time was because the recipe did mean fan oven... I may have been better off taking it out a little earlier too.

Anyway, apart from a slight overwhipping of the eggs it turned out good, and as you can see we already ate half of it! So I guess it is possible to make a slightly low fat cake that tastes good

Sunday 3 February 2013

Intro


I had a blog a few years ago, which I abandoned because I wasn’t sure there was a point in having one if you don’t have anything special to say. Anyway, here’s giving it another go.  I kind of decided that if no one reads it it doesn’t matter, it will just serve as a diary for me :)
Just as an indication of what I’m interested in, I have almost finished the shape shifter shrug from the “vampire knits” books. Here is the Ravelry link for those who are on it (and if you are knitter you really should be!)
And here is the second half blocking on my old yoga mat under some cookbooks.

And here is a close-up of the first half.


I just need to stitch them together and the stitch the buttons on. Can’t wait for it to dry!