Showing posts with label sewing. Show all posts

Sunday, 31 January 2016

Back to 'school' Lilou

You may, or may not, have noticed my absence in the past few months. I've been a terrible blogger. I actually made so many things just before the holidays, so it wasn't a hiatus from crafting, just from blogging about it. The problem, I've found, is taking decent photos of the finished objects, I kind of forget to do it, or there's never a good time, I have even written a few posts that I never published because I never took the photos.

Which brings us to today. I will apologise now for the terrible photos included in this post, but I really wanted to get back into blogging and I am home alone this weekend. I am not really photogenic as it is, and have a terrible tendency to blink or make weird facial expressions just as the camera goes, and having to take the photos myself certainly doesn't help. Especially because there's no one there to make me smile like a normal person. But fuck it, here we go.

I call this the "back to 'school' dress", even though technically I should have called it the "back to work" dress, but it doesn't really have the same ring to it, does it? Anyway, as some of you know, in 2014 I decided to take a career break and go back to school/university for a year, which was followed by months of freelancing (aka working in my pyjamas on my sofa). However, tomorrow I am starting a new job, in a real office, interacting with real people. Which is freaking me out! So to deal with it, I decided I needed a new dress.


This is the Lilou dress from Love at First Stitch, and I stole the idea from another blogger. I wouldn't have normally picked to make a plain, denim dress, but I thought it might be a fun blank canvas to wear with interesting tops, rather than just make another denim skirt. I even bought the exact same fabric, mainly because I wanted to make sure that it wouldn't be too thick to wear as a dress.


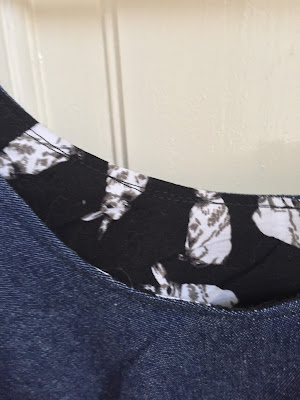
New skill alert: I lined the bodice of this dress, using the rabbit fabric that was leftover from my circle skirt. That turned out to be pretty straightforward (and a nicer finish I think than facings), although having to turn it inside out was a bit of a pain in the ass, potentially because of the thickness of the fabric.


I am fairly happy with it overall. The back is a little gapey, as usual with Tilly's patterns on me, so perhaps next time I will try and modify the bodice slightly to get a better fit. Also, there are a few lumps and bumps in the bodice where the lining and main fabric don't quite line up, but I don't think it is that obvious, and I'm sure that gets better with practice.

I am also sticking to the metal zip, which is significantly easier for me to install than any of the other zips, I have not idea why I find zips so hard!


The top underneath is also a new make by the way. I bought a ton of stuff during the Girl Charlee fabric sale, including this cute number. The pattern is from Gertie Sews Vintage Casual, modified to have slightly puffy sleeves.

Anyway, wish me luck! And I promise to write up at least some of my recent makes soon...

Sunday, 11 October 2015

Of trees and owls: Henriette and Akita

I've been incredible lazy and slow at posting, apologies to anyone who actually follows the blog. I have been crafty, just not really had time to write about it, promise! Here's a bonus picture of Dr Jenner mid-lick, with a hint of the project below (if you are not interested in knitting, you can probably stop here).


Let's start with the Henriette cardi by Andi Satterlund. Remember I said I wanted to get some cotton yarn that behaves more like wool and was thinking of trying Blue Sky Alpacas? Well, I did, and I tell you, this yarn is awesome! Its soft and squishy like wool but also non-itchy and light like cotton. I managed to find some on sale from Mrs Moon so it wasn't horrendous, and it turned out that I bought a whole skein more than I needed (I think I bought four skeins but I only used three) so this wasn't as expensive as I thought it was going to be.


So, back to the cardi. Simply said, this was complicated. Andi does call it a challenging knit, to be fair to her, but I feel that perhaps it is written in a more complicated way than strictly necessary. I essentially had to take notes on what  I was supposed to do for every single row and have at least two if not three sheets of instructions in front of me at all times. I tried to knit some of it during a long drive to Cornwall to use the time for something useful, but the complex instructions along with me getting car sick (apparently knitting on the bus and the car have a different effect) meant that it was impossible.

I didn't deliberately make any modifications, but I completely misunderstood the instructions for the lace/cable trees in the bottom back of the cardi so I think I basically ended up with one giant tree in the middle and two bushes on each side. Oh well!


For anyone interested, the back has three consecutive sections of the lace/cable pattern and the instruction is to start the first and third at row 11 and the middle one at row 1. What I did was to stick to 11-20 for the ones on the side (the 'leafy' top of the tree) and 1-11 for the middle (hence the long bark). Whereas towards the end I realised that I was meant to just keep cycling through the pattern instead (eg the middle column would go from 1 to 20 and then back to 1). The instructions towards the end also got a bit confusing, where you are decreasing and thus loosing bits of your tree lace/cable, but I have to admit that I forgot what I did there. It definitely had an element of improvisation as I didn't understand the instruction.


At the moment the buttons I have on there are too small so it doesn't look great closed, and I am hoping that the look will improve once I replace them. It does, however, seem to be a little big on the shoulders (it sort of slides down), and I am not entirely sure how to fix this, perhaps picking up fewer stitches for the button band would help? It would also stop it from puckering, which it does at the moment when buttoned up. I think I would also make the sleeves longer if I made it again.

And as another bonus, I have a sewing project to share that I can't be bothered to write a separate post for (now that I am on the roll and all). This is the seamwork Akita top, which came for free with the first issue I subscribed to (although now the seamwork team has decided to let you pick whichever pattern you like every month, which would have been handy last month for me instead of paying for the Astoria). And yes, this top has owls, woo hoo! (or hoot hoot!)

I read lots of people commenting that this is an odd one as it is one giant piece sewn together on the sides, and to be honest, I am not sure it really works, at least not on my frame. It looks quite baggy at the top but then it is too tight around the hips, to the point where I had to make the side slits longer. I also have a sneaky suspicion that I cut it against the grain (still struggling a bit with this), which may explain, first why the owls are sideways, and also how it hangs. But, I have worn it once already and it is quite comfy so I'm not giving up on it.


I also decided to add a little label so that I can tell which is the front and which is the back, which for some weird reason is making me very happy.


Ok, that's it for now, hopefully I won't take ages to write again.

Saturday, 19 September 2015

Quickie makes: the Seamwork Astoria jumper and Gertie's mini skirt

My knitting has stalled thanks to a new addition to the family, Dr Jenner, which interferes with my balls of yarn (yes, the rumours are true, cats do have a yarn obsession!) He wasn't exactly helpful with sewing either, but it was a little easier to get him out of the way and sew some quickie projects.


On a whim I signed up to Seamwork, Collete's monthly online sewing magazine that also comes with two free patterns which are meant to be beginner-friendly and doable within 3 hours at the most (a bargain at $6 a month, but I suppose only if you fancy the patterns). Of course instead of making the ones that came with my subscription, I decided to buy the Astoria , a boxy cropped jumper made in knit fabric - still, that was only $5! that's nothing! Especially because I've already made two.

What's interesting is that this is a perfect demonstration in how using different fabrics can give you completely different results. The first Astoria I made using some sweatshirt fabric, as recommended by the pattern and, frankly, because I had some lying around. I cut the size as measured, yet it turned out fairly tight, to the point where its a bit of a struggle to put on and take off. And when I wore it the other day I felt a little suffocated by it (even though it wasn't touching my neck, must have been mostly psychological).


The second one I made using some Hacci sweater knit fabric from Girl Charlee - I had no idea what that meant until my parcel was delivered, but let me tell you, this is the softest, most comfortable fabric ever! It was, however, a bit of a bitch to cut and sew, not because it curled, mainly it stretched a bit too much and the layers kind of stuck together. No matter, its such a joy to wear, and I'm sad that its so thin I'm unlikely to wear it for much longer (weather in London has taken a turn for the worse).


I don't know if you can spot the different when worn (eg, the neckline on the black one is much higher), but here is a close-up of the two together as well.


Oh, and the skirt is another quickie make. This is from the Gertie Sews Vintage Casual book, the pencil skirt modified to a mini A-line skirt, made in a Ponte fabric. To be honest, this is not really my best work, I made it a bit too short (because I didn't read the instructions properly) and so to compensate for that I adjusted the elastic so that it would sit quite low, but I didn't do a great job so its still a little big. Its a cute little cover-up for the days I fancy wearing leggings though so I'm happy enough with it. 

Sunday, 6 September 2015

Dipping my toe into intermediate territory - The Pauline Alice Cami dress

I've wanted a shirtdress for a while now (like the Colette Hawthorn and the Sew Over it vintage shirt dress) but they are all intimidatingly tagged as intermediate or advanced.

But when I came across the Cami dress by Pauline Alice, which was very cheap as far as sewing patterns go and involved only printing 14 pages, I decided to give it a go. I figured I could brave an intermediate pattern if I don't rush and just carefully work each step. My fabric was also pretty cheap so it wouldn't seem like such a huge loss if I messed it up.

And it has pockets!


And I don't think my attempt is that bad for someone who has been sewing for only a year! I love the colour and the fit of the bodice from the front - the back has my usual pooling of fabric, which I think I should finally try and sort out next time I make a dress. Its not as bad as usual though because I made the shoulders one size smaller than the chest and waist, which helped a bit. The waist could have been a little smaller too, it was not as fitted as I had hoped so I increased my seam allowances further to tighten it up a bit.


I had to make some crazy, thrifty pattern placement when cutting as I discovered that I didn't have quite enough fabric. I ended up cutting the pockets from a different fabric, but the collar was a bit of an accident. Essentially I was being my usual self and not reading the instructions properly so I didn't see that I had to cut two of each collar pattern piece. By the time I realised, I had thrown away the tiny scraps  I had left over so I had to use a bit of an old duvet cover. We are going to pretend that this was a design decision though!

I suppose what makes shirtdresses not friendly to beginners is the collar and the buttonholes/button placket. But to be honest, they were not that hard. I had already done buttonholes for the Arielle skirts, and although I got a bit confused with what I was meant to do with the collar, Pauline Alice's instructions and a video I found on youtube were very informative, so it all worked out fine.

Where I had real trouble was gathering and attaching the skirt to the bodice. My first attempt was a bit of a disaster, as my gathers were not even so it looked like I had a huge hump on my right hip. I ripped it and tried again, and I am still not 100% happy with them and I can't work out whether it is my technique or the skirt just doesn't really suit me. I like it a lot with the belt but I think it looks a bit weird without it and that's because of the shirt. So next time I make this I think I am either going to make a less voluminous skirt or switch to a circle skirt or an A-line skirt.

Belt-less and a bit weird?


The zipper was another disaster. I haven't had great success with zippers so far, and this wasn't helped by the fact that the zipper I bought doesn't have teeth on the inside, which meant I had to attach it from the outside, and it kept moving around and just being annoying. The fact that this was a side zipper complicated matters further, as I had never done one before. I intend to try and do it again, and possibly even replace it with an invisible zipper (no idea I didn't use an invisible zipper in the first place, definitely next time!)

All in all though I am very happy with it. When I was trying to decide whether to make it or not I looked at all the blogs I could find to work out whether I would be able to do it but all the bloggers were quite experienced (and thus could not offer this info). So if you have come across this post and are an adventurous beginner trying to decide whether to make this, I say go for it!


Tuesday, 1 September 2015

My Made Up Initiative pledge: Arielle skirt(s)

I am fascinated by the fact that there is such a thing as an online sewing community and delighted to be part of it now, along with my online knitting community on Ravelry and Google Plus. One of the blogs I follow set up the Made Up initiative, relying on the sewing community to pledge finishing a project and raise money for the National Literacy Trust. And as a bookworm myself, I couldn't help but join in, pledging to finish not one but two Arielle skirts.

You see, I realised that I have a ton of dresses, store-bought and now handmade, and a ton of t-shirts. However, I have little to pair them with because I don't have that many skirts and I don't like wearing jeans (even though I have way too many pairs of jeans!) It was time to make some skirts, and the Arielle just seemed perfect.

This denim one  (photographed in Cornwall on its first outing) is the first one I made. When I tried it on before sewing on the buttons I thought it was too small so I changed the seam allowances to 3/8. It turns out it would have been fine, the problem must have been the fabric, which although was tagged as medium weight on the Minerva website, it was labelled as heavy and was actually heavy (the pattern calls for a medium). Making the buttonholes for the first time was also a breeze, although I had trouble opening them up (possibly because of the thickness of the fabric?).


The buttons are super-cute little ladybirds but having worn the skirt now once I think they were a mistake as they have been a pain to slot through the buttonholes! I foresee having to sew them back on several times in the skirt's lifetime.

I also made a black cotton sateen one that creases like crazy and seems to attract all the dust and dirt around - I washed it together with a cordroy fabric I bought at the same time and it picked up a ton of fluff! For this one I left the seam allowances as they were supposed to be and it fits fine. There is something weird about it though, can you spot it? Its the wrong way round! I have no idea how that happened, but anyway, I'm not too bothered about it. Again, the buttonholes are not great (had trouble opening them) but I'm hoping this will improve with practice. At least these buttons are a bit more practical despite also being quite pretty. No fancy backdrop here I'm afraid, just my living room!


Oh, and I made another Lady Skater. Number three is slightly customised, with a sort of pleated sweetheart neckline (following the instructions on my most recent purchase, Gertie sews vintage casual). I also decided that I didn't really like the colour of the fabric I bought for it (I thought it would be a deep burgundy but its more of a rust), so I used some black fabric for the bodice to break it up a bit. I didn't like the join of the top and bottom though and decided to add a belt to cover it up.


Sunday, 2 August 2015

Summer crafting with Miette and Birdy skater

Despite appearances, I haven't been lazy. To prove this, I'm posting two - yes two - projects today: the Miette cardigan and the Birdy skater.


Summer is definitely not the time of the year for knitting, but after finishing my Castle Pullover, I decided to make a summer cotton cardi. I wanted something cropped and with short or 3/4 sleeves to wear over dresses as an extra layer. Andi Satterlund's designs are super cute, to the point where I couldn't really decide which one I wanted, so naturally I went for the free one.


The pattern is really well-written and well-designed - I particularly liked how it all comes together through the addition of the button-band and collar. The only modification I made was to made the sleeves a little shorter, which was a good thing because I almost ran out of yarn (7 skeins of the Drops Paris). Annoyingly, I didn't write down what I did for the first sleeve so I almost ended up with mismatched sleeves, but thankfully noticed the discrepancy soon enough. I also skipped the ktbl in the rib and stuck to plain k2p2 rib instead (out of laziness, I will admit).

I wish I had made it a little shorter though, but that might be the cotton rather than the pattern. The cotton yarn also means that it doesn't lay as nicely (the lace detail around the button-band and collar doesn't lay that flat and is not so obvious) and the whole thing is a little big, probably due to the lack of springiness.

Even so, I have already worn it twice, so it clearly serves its purpose well. But perhaps there is a cotton yarn out there that has a bit more springiness (I'm thinking Blue Sky Alpacas, which is meant to behave like wool, although it is very pricey). Or I should just stick to cardi patterns that don't have any lace.

Underneath the cardi, you will notice a new version of the Lady skater, or in this case Birdy skater.


I loooove this fabric! I got it from GirlCharlee after much deliberation, and its certainly exactly what I wanted when looking for a t-shirt-style fabric as well as being very soft and very pretty. However, it certainly had all the qualities of knit fabric that make people scared of it. It curled quite a lot while I was sewing it, the pins kept falling out, and I think I may have stretched it in a few places.

After last time, I got the Colette Guide to Sewing Knits, which had a few good tips and made me think that I should explore the other stitches in my machine that may work better than a simple zigzag. I discovered that I have a knit stitch that does indeed give it a fake-overlocker (and therefore more professional) look. It did, however, eat a lot of threat, was slower and needed a bit of help to move along right at the start of a line of stitching. Also, like with a real overlocker, picking stitches when making a mistake was a pain. But it definitely feels sturdier so I think its worth using.


I also tried a stretch straight stitch for my hem (which I think just back tacks while sewing straight), and it gave it a nice edge, probably one of the best hems I've sewn. But I'm not sure its good for knits despite being a stretch stitch, as the hem ended up being a bit curly.


Tuesday, 23 June 2015

The ladybird skater

I've enjoyed my first year with my sewing machine, and I still can't believe that I have been able to make dresses that I wear and love. But, like most people, the bulk of my clothes are made with knit, not woven, fabrics. Which meant that, if I wanted to make clothes that I love wearing, I had to attempt sewing with knits.

At the time I didn't realize that being scared of knit fabrics was a thing, but given my general haphazard approach in life and craft, I thought it might be worth taking a class - Craftsy's Sewing with Knits gave me an awesome hoodie dress (that makes me look like I am ready for a pagan ritual of some sort). Since then, I have made three version's of Tilly's Coco tunic dress, some more successful than others. What has really been confusing is the actual fabrics rather than how to sew with them. I just wanted basic t-shirt-style fabric, but because I tend to buy them online, I never seem to get what I am after.


My first attempt was with a Ponte Roma from Plush Addict (that's the grey one), which was thicker and a bit shinier than what I wanted. The next one was jersey from Minerva Crafts (the stripey one), which was perfect - jersey, I concluded, is what I want to be buying. But then the jersey I ordered from myfabrics was much stretchier, a bit like leggings fabric, and not the nicest for a dress (the patterned one). I decided to give it another go and ordered interlock from Tissu, and once again, success (and insanely cheap)! So at this point, and despite reading a sewing book on knits and sewing advice on the internet, I am still confused about the perfect knit, t-shirt-style fabric.

Anyway, here is what I made with my interlock fabric - the ladybird skater dress. The Lady Skater dress is quite a popular one among sewing bloggers, and I can see why, I absolutely love it! It is a good fit (although a tiny bit of sag around the back), with a lovely full skirt and nice finishing around the collar and sleeves; I much prefer the neckline finish of the Lady Skater to the Coco (sorry Tilly!).


I got a little bit confused about what size to cut, as the pattern only notes the bust and waist size, but not the hips, where I normally grade up. I tried to work it out myself and decided to cut a size 2 for the top and a 3 for the skirt. In hindsight, a 2 throughout would have been fine, and I got a response from the designer, who told me that the skirt is full enough to not need grading.

Of course, this wasn't completely problem-free. The dress requires adding some clear elastic to the shoulders and waist, and this seemed to constantly be breaking my thread, which was pretty irritating. I wasn't using good polyester thread (I forgot to buy red thread and just used the thread that came with my sewing box), which might partially explain this. I also managed to break my needle at some point (!), but thankfully I have a full pack of them. I did buy a twin needle to hem the skirt and sleeves, but after the needle-breaking incident, I was a bit too scarred to use it, perhaps next time!

Tuesday, 9 June 2015

Starry Crepe (the wearable kind)

I have spent the past month trying to decide what to sew next - this is turning into a serious obsession! I seem to be possessed with the idea that I have to make all of my own clothes, at least the fun things like dresses, as I get some much pleasure out of wearing my handmades. And yes, I have been knitting as well, its just that knitting progress is quite a bit slower.

The winner of my endless browsing of sewing patters was the Colette Crepe, a wrap dress that had the benefit of no zips or other closures, and the benefit of pockets, pockets! I bought the pdf pattern because of the instant gratification but also because of the bonus of having a digital copy of the pattern in case I cut the wrong size, tear it, whatever. It seemed like a good idea at the time anyway. Not so much while I was sellotaping together 58 pages of pattern. I think it took me about 2 hours (!), and I'm pretty sure I went a bit crazy (but didn't learn, I have since bought another pdf pattern, but at least that one is only 22 pages).

While I was researching the dress I saw that there had been a sew-along on a popular sewing blog, with tips on sewing, fitting etc, and I had all the best intentions to read through it, but I didn't. I also didn't try and fit it on a muslin/toile first either. I just can't deal with the extra effort yet, as I said before, I see the first copy of the dress as a wearable muslin that I can learn from and improve on next time.

Anyway, enough talking. Here's the dress. I had to combine a size 2 for the top and a size 8 for the bottom, which seems crazy but the sizes are actually very close together.


And, surprise, surprise, it's a little big. I mean, its a wrap dress so its not especially noticeable, and I probably wouldn't have expected a better fit from a store-bought dress, but if I don't tie it tight enough around my waist, the back sags a bit. So I am tempted to cute the bodice in a size 0 next time and maybe decrease the skirt one size as well, its quite a full skirt so it can probably handle it.


Even so, its really cute, especially with this fabric. I really like the back when its not saggy and I think its a much better way to do a wrap dress (the ones that wrap in the front always seem a little frumpy to me).  I also loooove the pockets, its so great being able to carry stuff around without a bag or even to simply rest my hands in them. I hadn't really understood how the whole thing would come together while I was sewing it, so one of the pockets is inside-out, oops! But its so simple, I think I could add similar pockets to other dresses as well quite easily now.


Tuesday, 5 May 2015

A nautical Megan dress

Exams are over, which means I can stop pretending I'm revising (while actually wasting time on the internet) and can instead take full days for crafting. I also felt in need of some new clothes, but in the spirit of handmade, I treated myself to some fabric instead. Let's just pretend it was a reward for finding a tiny bit of motivation to revise and for having to sit down and write essays, by hand, for 3 hours (what was I thinking?).

I was going to be lazy and make another Francoise, possibly a sleeveless version for summer, most probably without trying to modify the size at all. But I feel there has been too much laziness recently so instead I decided to experiment and make the Megan dress from Tilly's Love at First Stitch book. There was always the risk it might be a disaster, in terms of fit, sewing experience etc, and in the spirit of experimentation, I embraced it!


It actually turned out to be not that bad, in fact I am rather keen on it - and I totally love this fabric, I was so glad I bought it. The cotton weight and style of dress (short sleeves) means that it is perfect for spring weather (and, realistically, summer weather in the UK as well!).

Here I am getting ready for a night out at Ultimate Power Ballads!


Of course the fit is not great, and that is completely my fault. I kind of screwed up combining different sizes and initially made the hips far too big and a little too soon, but I was able to fix that by taking in the seams a bit - that much I can handle. Part of the problem in this case is that I got confused while adjusting because the dress pattern comprises separate top and bottom pieces, and I went a big crazy with the tracing. The collar also seems to be too big and gapes at the back a bit, I thought I had done better than my Francoise dress by using the darts for the smaller size in the back to take it in a bit, but that wasn't enough in this case. I do wonder whether I'm cutting too big a size every time out of fear of the dress not fitting? I am debating whether I should go to a class that specifically focuses on alterations for the perfect fit, as I am not able to work out myself how to fix these issues...


Regardless, I may look at this one day and think its poor, but for the time being, loving the new dress :)


Sunday, 14 December 2014

Holiday stars with Francoise

A couple of years ago Orla Keily did a line for Uniqlo that featured a really cute 60s-style dress with 3/4 sleeves and collar in a range of pretty Orla Keily prints. Within a few weeks, at least three of us at work turned up wearing it. It became one of those slightly stressful affairs where you really want to wear something but don't because you assume that someone else is going to be wearing the same thing.

Anyway, that was kind of a random comment, but when I saw the Francoise dress by Tilly and the Buttons, I immediately thought of that Orla Keily dress (which I still wear loads). So now I had to have the pattern!  (it helped that Tilly did a little pattern sale at some point in November so I could justify it on top of the Love at First Stitch book).

I thought I'd be a bit more organised and aim for a more successful sewing session by making a toile - this is basically a fake, pre-dress to check if you need to alter the pattern. My duvet cover dress (!) seemed ok other that the waist doing with a bit of taking in; I had combined two different sizes already to accommodate the hips but I couldn't work out how to go down a size at the waist. The sleeves also seemed to be positioned slightly in the wrong place and felt a little tight.

Lovely duvet cover dress


I also wanted to try Tilly's method of tracing the pattern directly onto the fabric. It didn't work, at least not with this fabric. I tried white, yellow, red and blue tracing paper, but you could barely see the marks. I spent hours trying to do this, determined to make it work. In the end, I settled for using the carbon to transfer the pattern onto tracing paper (which was much easier than using a pen).

So without further ado, here is the real thing. I am sooooo happy with it, I couldn't stop staring at it after I finished it late last night (it took some marathon sewing sessions to get it done by the end of the weekend).


Yes, it could be a bit more fitted around the waist (I improved on the toile by taking the back darts in, which were simpler than the the front darts). And yes, it is a little loose around the back shoulder area. But at this point I am happy to have made such a pretty dress that fits me. I am sure that with time and confidence I will learn to make alterations to make the fit even better.


I shortened the sleeves slightly (by 5 cm) from the pattern and also changed the seam allowance to 1cm, which took care of the restriction I experienced with the toile. I'd also seen that Tilly suggested adding ribbon to the Megan dress, and I thought that might work quite well here too.

All in all, I would say this is the most successful project so far, and the one I am going to wear the most. I see many of these dresses, in different fabrics and pattern variations, in the future :)

Wednesday, 10 December 2014

Sew Over It dressmaking escapades

With knitting, I am completely self-taught (books, youtube!), which was mostly fine although I am sure some things may have been easier if I had had some hands-on  help. I had been debating whether a sewing class might be a good idea (for example, to actually find out the best way to do zips as opposed to the many of ways I discovered online...). And after some deliberation I decided to try out the Intro to dressmaking weekend at Sew Over It, a sewing shop/cafe in London.

I have to note here that I took this course in October, so this is a very very belated review. I kept meaning to take nice pictures of me wearing my makes and absolutely failed, so I decided to just take photos of the clothes - you will just have to imagine me wearing them (I've worn the skirt twice already so you may even remember it).

The shop in Clapham is a lovely space spread over two floors (we were in the basement but there was another course going on upstairs), with very friendly staff and lots of beautiful fabrics to choose from. Wasn't the best location for me, but they have recently opened a second shop which I may need to visit in the future.

The course was spread over a weekend, with the Saturday involving sewing a circle skirt and the Sunday a shift dress. There were only three of us on the Saturday and four on the Sunday, which was great because we had more space to work and more personal attention from the teacher, Laurel Waldron.

I arrived bright and early on the Saturday (so early in fact that I had to wait 20 minutes until they actually opened the shop), with my bunny fabric purchased from the Knitting and Stitching Show, eager to learn. I had been a little paranoid the day before and practiced by making yet another cushion, just to make sure I remembered how to use the sewing machine!

Everything was going smoothly at first: we cut the pattern to our size, learned how to place the pieces on the fabric, and sewed the pieces together. I even had time for a giant slice of chocolate cake!


Now, my memory is a little fuzzy, but I think it went a bit wrong for me after we installed the zipper (which fingers crossed I have now established in my head and will no longer have trouble with in the future). The pattern for this skirt involves hand-stitching the waistband for a more professional finish, at which point I discovered that, like with knitting, black is a terrible colour because you just can't see anything - which is annoying because I love black. So here I fell a little behind everyone else, and the competitive side of me got a bit stressed about being last.

This continued when we were doing the hem, which was sewn with the machine but was a right pain because it took ages of ironing and pinning, this being a giant circle skirt. (Note: I sort of messed it up and so decided to rip it when I got home and hem it again. And did a terrible job of it again. But as Laurel kept saying to me, practice, practice).

Don't the bunnies look a bit like pineapples??


Full circle!


On day 2, dress day, I was determined to do better. Once again, measure, pin, cut, sew pieces together (and useful tips on how to modify pattern to fit my measurements). Then came the overlocker, and things went a bit downhill once again. Using the overlocker on a straight seam was easy and quite fun actually, but when it came to more curved lines it was really hard to control (practice, practice!). I started falling behind once again, and kept getting flustered when things like my bobbin run out (twice...).


Aaaanyway, with Laurel's help I mostly finished it, with just the hem to do at home. Which was a good thing because when I got home the dress was too tight (despite correct measurements and expanding to accommodate the big hips). I attempted to fix this by opening up the seam, which made it marginally better but still did not look particularly flattering (perhaps not the best dress shape for me). 

But all is not wasted, the pattern is drafted to also make a top or tunic, so I decided to cut the dress and make it into a cute little smart top. 


All in all, a great weekend with some useful tips and two semi-wearable garments. I had concluded that I probably wouldn't make the skirt again, but its actually quite fun to wear so it may have a little sibling in the future.


Saturday, 13 September 2014

Sewing disasters, and my first Delphine skirt

So, cushions done, pyjamas done, zipped cushions done - it was time for my next piece of homework, making a proper, going-to-wear-it-in-public skirt. Yikes! The stakes were high, can't walk around with a tattered skirt that holds the risk of falling off any second. But a girl has gotta practice.


I neglected to take step-by-step photos of this expedition, so you will just have to picture it. The first challenge was to re-size the pattern, the Delphine skirt from Love at First Stitch. By now you know about my disproportionate hips versus waist issues, but this pattern allows resizing, hurrah! I wanted the skirt to sit lower than the picture so I measured that part of my waist, then my hips and then combined to draw a new size.

This time I decided to try a new method of cutting as well - I pinned the cut pattern onto my fabric and then cut it directly rather than re-drawing. I definitely saved time and I don't think it was less accurate, so I might stick to it in the future.

It was all going smoothly, sewing the different parts of the main skirt together, fusing the interfacing to the waistband to make it stiffer, all good. Until I got to the dreaded zip. I didn't blog about this last week, but I had a hell of a time trying to understand how to sew a zip on, as different people seem to do it in completely different ways, and my pattern did not explain what you are supposed to do when you get to the head of the zip (to avoid damaging the needle).

But all that practice helped (that was the intention anyway) so I felt ready to tackle the concealed, or invisible, zip. I even bought the special foot (attachment) for my sewing machine. Yet, when I opened the zip pack, I got confused: what I was holding in my hand did not look like what was on the photo (despite the fact that I selected concealed zip on the menu). The zip teeth were meant to be hidden in the front, but on my zip they were hidden in the back....

So, guess what I did? I winged it, again. I guess I could have ordered another concealed zip and done it properly, but I decided to just attach the regular zip and see what happened.

And it sort of worked. I do have a skirt and it doesn't look like it is going to fall apart any second now. My zip is completely misaligned though, I have no idea how, and why, that happened but hopefully not too obvious.

The main problem is that the skirt does not fit me well at all. It does not sit where I intended it to, it sits where the pattern intended it to (ie high up) - I imagine that to get it to sit lower, I should have made the hips one size bigger? But the issue is that because it is high up, it is actually gigantic!

Too big!

And in case it wasn't clear in the previous photo


The funny thing is that the pattern helpful suggests a point where you can try the skirt on (before finishing the waistband) to see if it fits and if it needs any alterations. However, for some reason when I tried it on then it was too tight around the hips so I decided it was not actually going to fit me at all and I should just finish it regardless.


Tuesday, 26 August 2014

My week in sewing - cushions, and the Margot pyjamas

While I am still knitting my Baby Corn (albeit in a slower than snail-like pace), I have been experimenting further with sewing. Making cushion covers. Lots of cushion covers. The plan is to eventually replace all the sofa cushions with new, hand-made ones. We have thoughts of replacing the sofa cover as well, but I think I should leave re-upholstering to professionals.


After three cushion covers I decided it was all cushioned out and ready to try something a little different and possibly a little scarier. So I went for project number 2 in my Love at First Stitch book - both of my sewing books are arranged as sort of workshops, with projects increasing in difficulty and different skills introduced in each workshop.

Anyway, back to the project, which was the Margot Pyjamas, an actual item of clothing, even if intended to just be worn at home and not seen by the public. I set off, all eager, first ironing my giant piece of fabric (I guess the recommended length is not for shorties like me), then tracing the pattern onto this transparency thing that I picked up at John Lewis and, after cutting the pattern, tracing it again onto the fabric for cutting.


Yes, a lot of faffing was involved, partially I guess due to inexperience. It took me ages to work out what size to pick (damn you small waist and giant hips), and then the various steps of tracing and re-tracing were so time-consuming, makes me wonder whether the tracing method Tilly recommends might be more efficient. At least now I have the pyjama pattern already traced so one step would be cut if I were to make them again in the same size.


The assembly and sewing itself were fairly straight-forward, apart from the fact that I didn't understand how to join the two legs together and ended up sewing them onto each other (this might not make sense but basically was unwearable and needed picking).


I love them because I made them, but there are some issues with the size. They look big - they are pyjamas after all. But I had to pick a bigger size than I needed to fit them through my hips. The ribbon helps them stay on, but I wonder whether a smaller size with an elastic waistband might work better. At least the length I somewhat arbitrarily picked seems right, they are sort of 3/4 to ankle-length, which is what I wanted.

I also can't decided if I like the fabric. I felt a little overwhelmed when I was at John Lewis and everything just seemed incredibly expensive - who pays £30 for pyjamas, especially badly made ones? (perhaps that is not the right frame of mind though). So I picked up one of the few that was on sale and had colours (purple) that I liked. But it is not the snuggly-type affair you would want from your pyjamas, and I don't even know if I like the pattern anyway.

Anyway, I am still happy with my first ever item of clothing - if you can call pyjamas clothing. I am wearing them right now in fact!