Wednesday, 29 April 2015

Lazy lazy winter, and my Liesl cardigan ready in time for summer

I have been a little slow both with crafting and with posting lately - somehow not having a job and a routine seems to disrupt everything for me, I seem to waste all the free time I have doing I'm not sure exactly what. I have sewn a few bits and bobs that I haven't bothered to blog about out of sheer laziness, and on the knitting front I have been working on one cardigan, Liesl, incredibly slowly!

Don't ask me what exactly happened. I think I started working on this in January, and pretty much finished the body in a couple of weeks - its a pretty easy and fast knit once you get going with the lace pattern. I even bought some buttons in anticipation of finishing it.

But then, I left it for maybe about a month before I did the first sleeve (which took me one evening to finish). Then, unexplainably I left it for a couple of months, pretty much forgot about it to be honest, until I made plans with a friend, who suggested we go for coffee, cake and knitting. Now, I forgot to take it with me to the date, but I did become motivated to finish the last sleeve. Hurrah! A woolly cardigan ready, just in time for summer!


I've made Liesl twice before (definitely got my money's worth!), once as a tiny little crop thing out of cotton for summer, for a friend, and once for me in a sort of cropped version, mainly because I couldn't get hold of more of the same yarn to make it longer. This time I was determined to make it a full length cardigan with 3/4 sleeves to make it a bit more wearable.


I also added a picot bind-off , although whether this was successful is debatable. At the very least I think it adds a bit more texture and interest to the edge.


It's fairly straightforward as the lace pattern is really easy to memorize, and the fact that it uses biggish needles means its fast too - the perfect project for all the rowan silk twist I bought at a bargain at the knitting and stitching show (and I have a ton of it left still, lots of Christmas presents in green silk this year!).


Tuesday, 24 March 2015

Lab Story mitten (or having fun being a student)

Student life has many perks, although I never expected that as part of my course (which has nothing to do with craft or fashion), I would be doing some knitting. Yes, one lovely Thursday afternoon a few months ago, my coursework was to design and knit a mitten while watching Gilmore Girls. Bliss!

The mitten is part of a group project that involved exploring an aspect of science communication and philosophy. I won't bore you with the theory, but we decided to do something to highlight the important, and overlooked, role of objects in science. Somehow, this idea became http://labstory.co.uk/ , a 'scrolly'-style website where we pretend that the lab equipment do the experiments at night to correct the scientists' mistakes.

Where is the knitting, you ask, and what does it have to do with it? Well, the 'what does it have to do with it' took a while to figure out, but we knew we wanted to do some knitting. I also knew I wanted to do double-stitch to try it out and add it to my list of knitting skills, as I don't think intarsia and I will ever meet again (the sweetheart jumper is still in progress and is probably going to be frogged very soon as I doubt I'm going to pick it up 2 years later).

So this gave birth to the Lab Story mitten (apologies for the poor quality of the photos, I have no idea why they turned out so fuzzy...).


In case you didn't get it, that is a PCR tube, complete with googly eyes and a smile (maybe I should have called it PCR tube mitten?), and if you try really hard maybe even a little cap (the tube lid). What is very cool about it, however, is that the mitten has conductive thread to allow the wearer to use a touchscreen - no more taking your gloves off to use your phone! In a frenzy of excitement, I bought quite a lot of this thread, although my flat apparently ate the rest of it and it has now disappeared.


I have written a rough pattern for it, which is not really worthy of being published on Ravelry (I don't think it is original enough to warrant it), but if anyone is interested, here goes:

Yarn: Tiger Aran (very cheap, which was perfect for this project, but I would not recommend it)
Needles: Erm, I seem to have forgotten to make a note of that, but was prob 5mm. Oops!

Cast on 30 stitches, join in the round

1. Knit 18 rounds on 2x2 rib (knit 2, purl 2)
2. Knit 2, place marker, make 1, place marker, knit to end
3. Knit 2 rounds
4. Knit 2, slip marker, make 1, knit to next marker, make 1, slip marker, knit to end

Repeat  steps 3 & 4 until there are 11 stitches between the markers

5. On the next round, knit 2, split 11 stitches onto waste yarn, join to continue knitting on the round
6. Knit until the tip of the little finger ( around 20 cm)
7. *Knit 4, Knit 2 together, repeat from * to end - 25 stitches
8. Knit to end
9. *Knit 3, Knit 2 together, repeat from * to end - 20 stitches
10. Knit to end
11. *Knit 2, Knit 2 together, repeat from * to end - 18 stitches
12. Knit to end
13. *Knit, Knit 2 together, repeat from * to end - 12 stitches
14. Knit 2 together to end - 6 stitches
15. Cut yarn, thread through remaining stitches to fasten

To make the thumb:
1. Pick up 11 stitches from scrap yarn, plus 2 additional ones, knit one row, joining in the round
2. Knit up to 4 cm
3. *Knit 2, Knit 2 together, repeat from * to last stitch, Knit 1
4. *Knit 1, Knit 2 together, repeat from * to last stitch, Knit 1
5. *Knit 2 together, repeat from * to last stitch, Knit 1
6. Cut yarn, thread through remaining stitches to fasten

The double-stitch was somewhat improvised, so I can't offer anything beyond more of a close-up of the tube. Its a fairly easy technique (as usual, I had to look at a bunch of youtube videos to get it), and once you get the hand of it it goes pretty fast. This will certainly be my technique of choice when it comes to adding patterns!


Tuesday, 17 March 2015

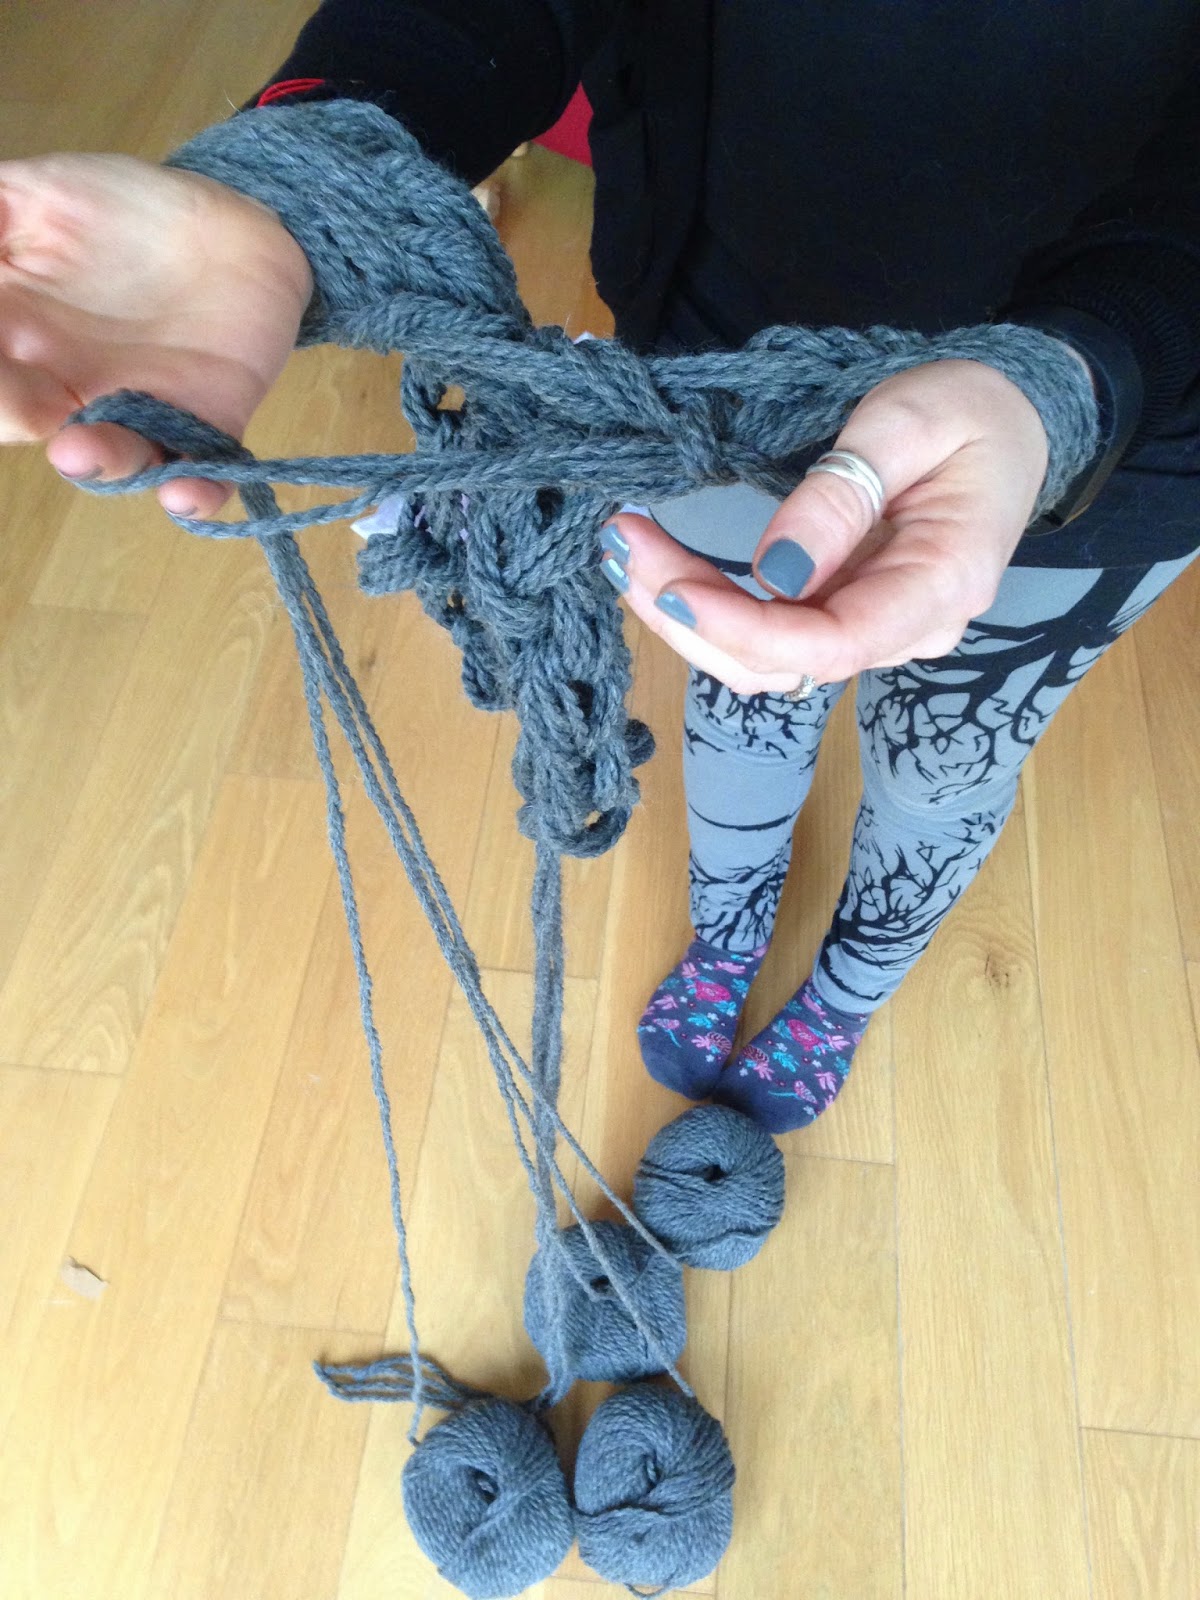
Fun times with arm knitting

I have been silent but not lazy in the crafts department, in fact I have had so many projects on the go, I have now lost track of what I need to write about! But I thought I'd start with my latest discovery, arm knitting.

Yes, I know, arm knitting is so 2014, I am totally late in the game. I randomly came across it through another blog (knitted bliss), and being my usual shopping-impulsive self, I bought the latest (and apparently most comprehensive) book on arm knitting. The idea is essentially what the name suggests: knitting using your arms instead of needles to create a rather open fabric, mainly using bulky or super bulky yarn. Other than just liking the look of this open fabric, the appeal here is that you can knit stuff insanely quickly, which is an excellent skill to have for all those last minute presents.

The book has a range of projects, some better than others (the beanie hat is a little weird and unattractive, for example), and detailed instructions on how to arm (and finger) knit - although I will admit that, as usual, I needed the visual help of youtube to fully understand what was happening.


Being, again, shopping-impulsive, I bought a ton of chunky yarn to make the vest that is on the cover of the book. And I made it, and it looked nothing like the pictures, nothing, it was a hideous mess of holes. I am not entirely sure where I went wrong, but it was a disaster. So instead, I decided to try the cowl (and there are tons of free patterns on the internet if you want to try this). It took around 30 minutes. If you are one of the people I make gifts for for Christmas, you might well be getting this next year!


I also tried finger knitting, which, again, as the name suggests, involves using your fingers (sometimes 3, sometimes 4, depending on the width of the project) to knit a fabric that looks a little like an open I-cord. This was a lot more straightforward that arm knitting (no youtube help required), and gave me a matching headband to my cowl in about 20 minutes (again, be warned, this may be coming your way!).


Anyway, its definitely worth exploring this if you haven't yet by trying out one of the free cowl patterns on the internet, and the book might be an investment if you think you might want to try a few more things. 

Monday, 2 February 2015

Peruvian scarf adventures

This Christmas brought me a new crafty toy: a loom! And with this, I think I have now completed my set of toys (she says...). Either way, I have officially run out of space and time to learn new crafts (she says, again...).

I had been toying with the idea of getting a loom since I did the weaving course last year, not one of the fancy ones I tried out during the course (which cost a fortune and are really fiddly to set up), but a little rigid heddle loom. Although it may technically be limited to stripes and checks, I think that is probably enough for me (and they do have the potential of more complicated patterns with a bit of improvisation apparently).

The (not-so) amusing thing is that setting up my little loom has been the worst part of the process so far, so I am very very glad that I did not even consider a proper floor room! Its pretty time-consuming, a little painful on my back and ideally done with a partner for ease and speed. Moreover, if you mess up the set-up in some way (for example, uneven tension), that can screw up the whole project, at least for an inexperienced weaver like me - that's what happened with my first project.

The picture below is quite forgiving, but there are many places where the two threads are not woven together, and the edges (the selvedges) are not that great. It also isn't quite long enough for my tastes. Not bad for a first attempt though.


So after a few weeks of procrastinating the second attempt, I finally set it up yesterday, with help this time to avoid any major mistakes.


And even though the set-up is a bit of a bore, once you get going, you get into a rhythm and voila! only a few hours later you have a beautiful scarf to show for it.


This second attempt was far more successful. I am very happy with the colour and the yarn is really nice. I used a plain wool yarn for the warp (the yarn that is threaded through the loom) and, for the weft (the yarn woven horizontally as you go along) the baby alpaca yarn I bought in Peru 2 years ago but had never quite figured out the best use for it. Which seems rather fitting given that I was first exposed to weaving in the weaver's colony in Peru.